Swashbuckle is a NuGet package that provides a way to automatically generate Swagger documentation for ASP.NET Web API projects. Swagger is a tool that helps developers design, build, document, and consume RESTful APIs. With Swashbuckle, you can easily add Swagger documentation to your Web API project by annotating your code with attributes that describe your API endpoints, parameters, and responses. Swashbuckle then uses this information to generate a Swagger JSON file, which can be used to generate interactive API documentation, client SDKs, and more.
There are three main components to Swashbuckle:
a Swagger object model and middleware to expose SwaggerDocument objects as JSON endpoints.
a Swagger generator that builds SwaggerDocument objects directly from your routes, controllers, and models. It’s typically combined with the Swagger endpoint middleware to automatically expose Swagger JSON.
an embedded version of the Swagger UI tool. It interprets Swagger JSON to build a rich, customizable experience for describing the web API functionality. It includes built-in test harnesses for the public methods.
The following dotnet add command installs the Swashbuckle NuGet package:
The call to AddEndpointsApiExplorer shown in the previous example is only required for minimal APIs.
Enable the middleware for serving the generated JSON document and the Swagger UI, also in Program.cs:
C#Copy
app.UseSwagger();
if (app.Environment.IsDevelopment())
{
    app.UseSwaggerUI();
}
The default endpoint for the Swagger UI is http:<hostname>:<port>/swagger.
Note
SwaggerUI is very useful in your development environment. It can be enabled in production, but you should consider any security requirements for your specific application before doing so.
Customize and extend the Swagger documentation
Swagger provides options for documenting the object model and customizing the UI. The configuration action passed to the AddSwaggerGen method can include additional information through the OpenApiInfo class.
The following code sample shows how to add information to display in the API documentation.
C#Copy
// Add using statement for the OpenApiInfo class
using Microsoft.OpenApi.Models;

builder.Services.AddSwaggerGen(options =>
{
    options.SwaggerDoc("v1", new OpenApiInfo
    {
        Version = "v1",
        Title = "Fruit API",
        Description = "API for managing a list of fruit their stock status.",
        TermsOfService = new Uri("https://example.com/terms")
    });
});
The Swagger UI displays the version and the added information:
You can group operations in your API with the .WithTags option. You can also add descriptive text describing the operation with the .WithSummary option. The following sample code shows using .WithTags to group the POST operation into both a post group, and a fruit group. It also adds the summary specified in the .WithSummary option to the operation.
ASP.NET Core supports two approaches to creating APIs: a controller-based approach and minimal APIs. A controller-based API is a traditional approach to building APIs in which each endpoint is mapped to a specific controller class. The controller handles the request, performs any necessary business logic, and returns a response.
Controller-based API
A controller-based web API consists of one or more controller classes that derive from ControllerBase. Following is an example of a controller:
C#Copy
[ApiController]
[Route("[controller]")]
public class WeatherForecastController : ControllerBase
Web API controllers should typically derive from ControllerBase rather from Controller. Controller derives from ControllerBase and adds support for views, so it’s for handling web pages, not web API requests.
The ControllerBase class provides many properties and methods that are useful for handling HTTP requests. For example, in the following code sample CreatedAtAction returns a 201 status code:
C#Copy
[HttpPost]
[ProducesResponseType(StatusCodes.Status201Created)]
[ProducesResponseType(StatusCodes.Status400BadRequest)]
public ActionResult<Pet> Create(Pet pet)
{
    pet.Id = _petsInMemoryStore.Any() ?
             _petsInMemoryStore.Max(p => p.Id) + 1 : 1;
    _petsInMemoryStore.Add(pet);

    return CreatedAtAction(nameof(GetById), new { id = pet.Id }, pet);
}
Minimal API
Minimal APIs are a simplified approach for building fast HTTP APIs with ASP.NET Core. You can build fully functioning REST endpoints with minimal code and configuration. Skip traditional scaffolding by declaring API routes and actions. For example, the following code creates an API at the root of the web app that returns the text, “Hello World!”.
C#Copy
var app = WebApplication.Create(args);

app.MapGet("/", () => "Hello World!");

app.Run();
Most APIs accept parameters as part of the route.
C#Copy
var builder = WebApplication.CreateBuilder(args);

var app = builder.Build();

app.MapGet("/users/{userId}/books/{bookId}",
    (int userId, int bookId) => $"The user id is {userId} and book id is {bookId}");

app.Run();
Minimal APIs support the configuration and customization needed to scale to multiple APIs, handle complex routes, apply authorization rules, and control the content of API responses.
An API, or Application Programming Interface, is a set of rules and protocols that allows different software applications to communicate with each other. APIs provide a way for developers to access the functionality of another piece of software, such as a web service, and use that functionality in their own applications. APIs are used for many reasons, including:
Simplifying development: By using APIs, developers can access the functionality of other software without having to understand the details of how that software works. This can save time and effort when building new applications.
Enabling integration: APIs allow different software applications to work together, even if they weren’t originally designed to do so. This can help businesses integrate their systems and data, improving efficiency and productivity.
Learning objectives
After completing this module, you’ll be able to:
Describe the two types of APIs in ASP.NET Core.
Create Swagger documentation for an API by using Swashbuckle.
Interact with an API by using the Swagger interface.
Blazor lets you bind HTML controls to properties so that changing values are automatically displayed in the user interface (UI).
Suppose you’re developing a page that collects information from customers about their pizza preferences. You want to load the information from a database and enable customers to make changes, such as recording their favorite toppings. When there’s a change from the user or an update in the database, you want the new values to display in the UI as quickly as possible.
In this unit, you learn how to use data binding in Blazor to tie UI elements to data values, properties, or expressions.
What is data binding?
If you want an HTML element to display a value, you can write code to alter the display. You need to write extra code to update the display when the value changes. In Blazor, you can use data binding to connect an HTML element to a field, property, or expression. This way, when the value changes, the HTML element is automatically updated. The update usually happens quickly after the change, and you don’t have to write any update code.
To bind a control, you would use the @bind directive:
razorCopy
@page "/"

<p>
    Your email address is:
    <input @bind="customerEmail" />
</p>

@code {
    private string customerEmail = "user@contoso.com"
}
In the preceding page, whenever the customerEmail variable changes its value, the <input> value updates.
Note
Controls, such as <input>, update their display only when the component is rendered and not when a field’s value changes. Because Blazor components render after any event handler code executes, in practice, updates are typically displayed quickly.
Bind elements to specific events
The @bind directive is smart and understands the controls it uses. For example, when you bind a value to a textbox <input>, it binds the value attribute. An HTML checkbox <input> has a checked attribute instead of a value attribute. The @bind attribute automatically uses this checked attribute instead. By default, the control is bound to the DOM onchange event. For example, consider this page:
razorCopy
@page "/"

<h1>My favorite pizza is: @favPizza</h1>

<p>
    Enter your favorite pizza:
    <input @bind="favPizza" />
</p>

@code {
    private string favPizza { get; set; } = "Margherita"
}
When the page is rendered, the default value Margherita is displayed in both the <h1> element and the textbox. When you enter a new favorite pizza in the textbox, the <h1> element doesn’t change until you tab out of the textbox or select Enter because that’s when the onchange DOM event fires.
Often, that’s the behavior you want. But suppose you want the <h1> element to update as soon as you enter any character in the textbox. You can achieve this outcome by binding to the oninput DOM event instead. To bind to this event, you must use the @bind-value and @bind-value:event directives:
razorCopy
@page "/"

<h1>My favorite pizza is: @favPizza</h1>

<p>
    Enter your favorite pizza:
    <input @bind-value="favPizza" @bind-value:event="oninput" />
</p>

@code {
    private string favPizza { get; set; } = "Margherita"
}
In this case, the title changes as soon as you type any character in the textbox.
Format bound values
If you display dates to the user, you might want to use a localized data format. For example, suppose you write a page specifically for UK users, who prefer to write dates with the day first. You can use the @bind:format directive to specify a single date format string:
razorCopy
@page "/ukbirthdaypizza"

<h1>Order a pizza for your birthday!</h1>

<p>
    Enter your birth date:
    <input @bind="birthdate" @bind:format="dd-MM-yyyy" />
</p>

@code {
    private DateTime birthdate { get; set; } = new(2000, 1, 1);
}
Note
At the time of writing, format strings are only supported with date values. Currency formats, number formats, and other formats might be added in the future. To check the latest information on binding formats, see Format strings in the Blazor documentation.
As an alternative to using the @bind:format directive, you can write C# code to format a bound value. Use the get and set accessors in the member definition, as in this example:
razorCopy
@page "/pizzaapproval"
@using System.Globalization

<h1>Pizza: @PizzaName</h1>

<p>Approval rating: @approvalRating</p>

<p>
    <label>
        Set a new approval rating:
        <input @bind="ApprovalRating" />
    </label>
</p>

@code {
    private decimal approvalRating = 1.0;
    private NumberStyles style = NumberStyles.AllowDecimalPoint | NumberStyles.AllowLeadingSign;
    private CultureInfo culture = CultureInfo.CreateSpecificCulture("en-US");

    private string ApprovalRating
    {
        get => approvalRating.ToString("0.000", culture);
        set
        {
            if (Decimal.TryParse(value, style, culture, out var number))
            {
                approvalRating = Math.Round(number, 3);
            }
        }
    }
}
In the next unit, you apply what you learned about binding controls to data.
Blazor includes several ways to share information between components. You can use component parameters or cascading parameters to send values from a parent component to a child component. The AppState pattern is another approach you can use to store values and access them from any component in the application.
Suppose you’re working on the new pizza delivery website. Multiple pizzas should be displayed on the home page in the same way. You want to display the pizzas by rendering a child component for each pizza. Now, you want to pass an ID to that child component that determines the pizza it displays. You also want to store and display a value on multiple components that shows the total number of pizzas you sold today.
In this unit, you learn three different techniques you can use to share values between two or more Blazor components.
Sharing information with other components by using component parameters
In a Blazor web app, each component renders a portion of HTML. Some components render a complete page but others render smaller fragments of markup, such as a table, a form, or a single control. If your component renders only a section of markup, you must use it as a child component within a parent component. Your child component can also be a parent to other smaller components that render within it. Child components are also known as nested components.
In this hierarchy of parent and child components, you can share information between them by using component parameters. Define these parameters on child components, and then set their values in the parent. For example, if you have a child component that displays pizza photos, you could use a component parameter to pass the pizza ID. The child component looks up the pizza from the ID and obtains pictures and other data. If you want to display many different pizzas, you can use this child component multiple times on the same parent page, passing a different ID to each child.
Start by defining the component parameter in the child component. You define it as a C# public property and decorate it with the [Parameter] attribute:
razorCopy
<h2>New Pizza: @PizzaName</h2>

<p>@PizzaDescription</p>

@code {
    [Parameter]
    public string PizzaName { get; set; }

    [Parameter]
    public string PizzaDescription { get; set; } = "The best pizza you've ever tasted."
}
Because the component parameters are members of the child component, you can render them in your HTML by using Blazor’s reserved @ symbol, followed by their name. Also, the preceding code specifies a default value for the PizzaDescription parameter. This value is rendered if the parent component doesn’t pass a value. Otherwise, the value passed from the parent overrides it.
You can also use custom classes in your project as component parameters. Consider this class that describes a topping:
C#Copy
public class PizzaTopping
{
    public string Name { get; set; }
    public string Ingredients { get; set; }
}
You can use that as a component parameter in the same way as a parameter value to access individual properties of the class by using dot syntax:
In the parent component, you set parameter values by using attributes of the child component’s tags. You set simple components directly. With a parameter based on a custom class, you use inline C# code to create a new instance of that class and set its values:
razorCopy
@page "/pizzas-toppings"

<h1>Our Latest Pizzas and Topping</h1>

<Pizza PizzaName="Hawaiian" PizzaDescription="The one with pineapple" />

<PizzaTopping Topping="@(new PizzaTopping() { Name = "Chilli Sauce", Ingredients = "Three kinds of chilli." })" />
Share information by using cascading parameters
Component parameters work well when you want to pass a value to the immediate child of a component. Things become awkward when you have a deep hierarchy with children of children and so on. Component parameters aren’t automatically passed to grandchild components from ancestor components or further down the hierarchy. To handle this problem elegantly, Blazor includes cascading parameters. When you set the value of a cascading parameter in a component, its value is automatically available to all descendant components to any depth.
In the parent component, using the <CascadingValue> tag specifies the information that will cascade to all descendants. This tag is implemented as a built-in Blazor component. Any component rendered within that tag is able to access the value.
razorCopy
@page "/specialoffers"

<h1>Special Offers</h1>

<CascadingValue Name="DealName" Value="Throwback Thursday">
    <!-- Any descendant component rendered here will be able to access the cascading value. -->
</CascadingValue>
In the descendant components, you can access the cascading value by using component members and decorating them with the [CascadingParameter] attribute.
So in this example, the <h2> tag has the content Deal: Throwback Thursday because an ancestor component sets that cascading value.
Note
As for component parameters, you can pass objects as cascading parameters if you have more complex requirements.
In the preceding example, the Name attribute in the parent identifies the cascading value, which is matched with the Name value in the [CascadingParameter] attribute. You can optionally omit these names, in which case the attributes are matched by type. Omitting the name works well when you have only one parameter of that type. If you want to cascade two different string values, you must use parameter names to avoid any ambiguity.
Share information by using AppState
Another approach to sharing information between different components is to use the AppState pattern. You create a class that defines the properties you want to store, and register it as a scoped service. In any component where you want to set or use the AppState values, you inject the service, and then you can access its properties. Unlike component parameters and cascading parameters, values in AppState are available to all components in the application, even components that aren’t children of the component that stored the value.
As an example, consider this class that stores a value about sales:
C#Copy
public class PizzaSalesState
{
    public int PizzasSoldToday { get; set; }
}
You would add the class as a scoped service in the Program.cs file:
C#Copy
...
// Add services to the container
builder.Services.AddRazorPages();
builder.Services.AddServerSideBlazor();

// Add the AppState class
builder.Services.AddScoped<PizzaSalesState>();
...
Now, in any component where you want to set or retrieve AppState values, you can inject the class, and then access properties:
razorCopy
@page "/"
@inject PizzaSalesState SalesState

<h1>Welcome to Blazing Pizzas</h1>

<p>Today, we've sold this many pizzas: @SalesState.PizzasSoldToday</p>

<button @onclick="IncrementSales">Buy a Pizza</button>

@code {
    private void IncrementSales()
    {
        SalesState.PizzasSoldToday++;
    }
}
Engaging websites need to display dynamic content that might change all the time. Learning how to obtain data from a dynamic source, such as a database or web service, is a fundamental technique in web development.
Suppose you’re working for a pizza delivery firm on its updated customer-facing website. You have a range of webpages laid out and designed as Blazor components. Now, you want to populate those pages with information about pizzas, toppings, and orders that you want to obtain from a database.
In this unit, you learn how to access data and render it within HTML markup for display to the user.
Creating a registered data service
If you want to create a dynamic website that shows changing information to users, you must write code to get that data from somewhere. For example, suppose you have a database that stores all the pizzas your company sells. Because the pizzas are always changing, it’s a bad idea to hardcode them into the website HTML. Instead, use C# code and Blazor to query the database, and then format the details as HTML so that the user can pick their favorite.
In a Blazor Server app, you can create a registered service to represent a data source and obtain data from it.
Note
The sources of data you can use in a Blazor app include relational databases, NoSQL databases, web services, various Azure services, and many other systems. You can use .NET technologies such as Entity Framework, HTTP clients, and ODBC (Open Database Connectivity) to query those sources. These techniques are beyond the scope of this module. Here, you learn how to format and use data that you obtained from one of these sources and technologies.
The creation of a registered service starts by writing a class that defines its properties. Here’s an example that you might write to represent a pizza:
C#Copy
namespace BlazingPizza.Data;

public class Pizza
{
    public int PizzaId { get; set; }

    public string Name { get; set; }

    public string Description { get; set; }

    public decimal Price { get; set; }

    public bool Vegetarian { get; set; }

    public bool Vegan { get; set; }
}
The class defines the pizza’s properties and data types. You must make sure these properties match the pizza schema in the data source. It makes sense to create this class in the Data folder of your project, and use a member namespace called Data. If you prefer, you can choose other folders and namespaces.
Next, you would define the service:
C#Copy
namespace BlazingPizza.Data;

public class PizzaService
{
    public Task<Pizza[]> GetPizzasAsync()
    {
    // Call your data access technology here
    }
}
Notice that the service uses an asynchronous call to access data and return a collection of Pizza objects. The data source might be remote from the server where the Blazor code is running. In that case, use an asynchronous call. Then if the data source responds slowly, other code can continue to run as you await the response.
You would register the service by adding a line to the Add Services to the container section in the Program.cs file:
C#Copy
...
// Add services to the container.
builder.Services.AddRazorPages();
builder.Services.AddServerSideBlazor();
// Register the pizzas service
builder.Services.AddSingleton<PizzaService>();
...
Using a service to obtain data
Now you use the service you defined by calling it in a Blazor component and obtaining data. Let’s suppose you have the following component code, and you want to display pizzas in it:
razorCopy
@page "/pizzas"

<h1>Choose your pizza</h1>

<p>We have all these delicious recipes:</p>
Injecting the service
Before you can call the service from the component, you must use dependency injection to add the service. Inject the service by adding the following code after the @page directive:
Usually, the component and the service are in different namespace members, so you must include the @using directive. This directive works in the same way as a using statement at the top of a C# code file. The @inject directive adds the service to the current component and initiates an instance of it. In the directive, specify the name of the service class. Follow it by the name you want to use for the instance of the service in this component.
Override the OnInitializedAsync method
A good place to call the service and obtain data is in the OnInitializedAsync method. This event fires when the component’s initialization is complete and it receives its initial parameters, but before the page is rendered and displayed to the user. The event is defined on the Blazor component’s base class. You can override it in a code block as in this example:
C#Copy
protected override async Task OnInitializedAsync()
{
    \\ Call the service here
}
Call the service to obtain data
When you call the service, use the await keyword because the call is asynchronous:
After getting some data from the service, you’ll want to display it to the user. In the pizzas example, we expect the service to return a list of pizzas that the users can choose from. Blazor includes a rich set of directives that you can use to insert this data into the page that the user sees.
Checking for data
First, we determine what the page displays before the pizzas are loaded by checking whether the todaysPizzas collection is null. To run conditional rendering code in a Blazor component, use the @if directive:
razorCopy
@if (todaysPizzas == null)
{
    <p>We're finding out what pizzas are available today...</p>
}
else
{
    <!-- This markup will be rendered once the pizzas are loaded -->
}
The @if directive renders the markup in its first code block only if the C# expression returns true. You can also use an else if code block to run other tests and render markup if they’re true. Finally, you can specify an else code block to render code if none of the previous conditions returned true. By checking for null in the @if code block, you ensure that Blazor doesn’t try to display pizza details before data is obtained from the service.
Note
Blazor also includes the @switch directive for rendering markup based on a test that might return multiple values. The @switch directive works in a similar way to the C# switch statement.
Rendering a collection of objects
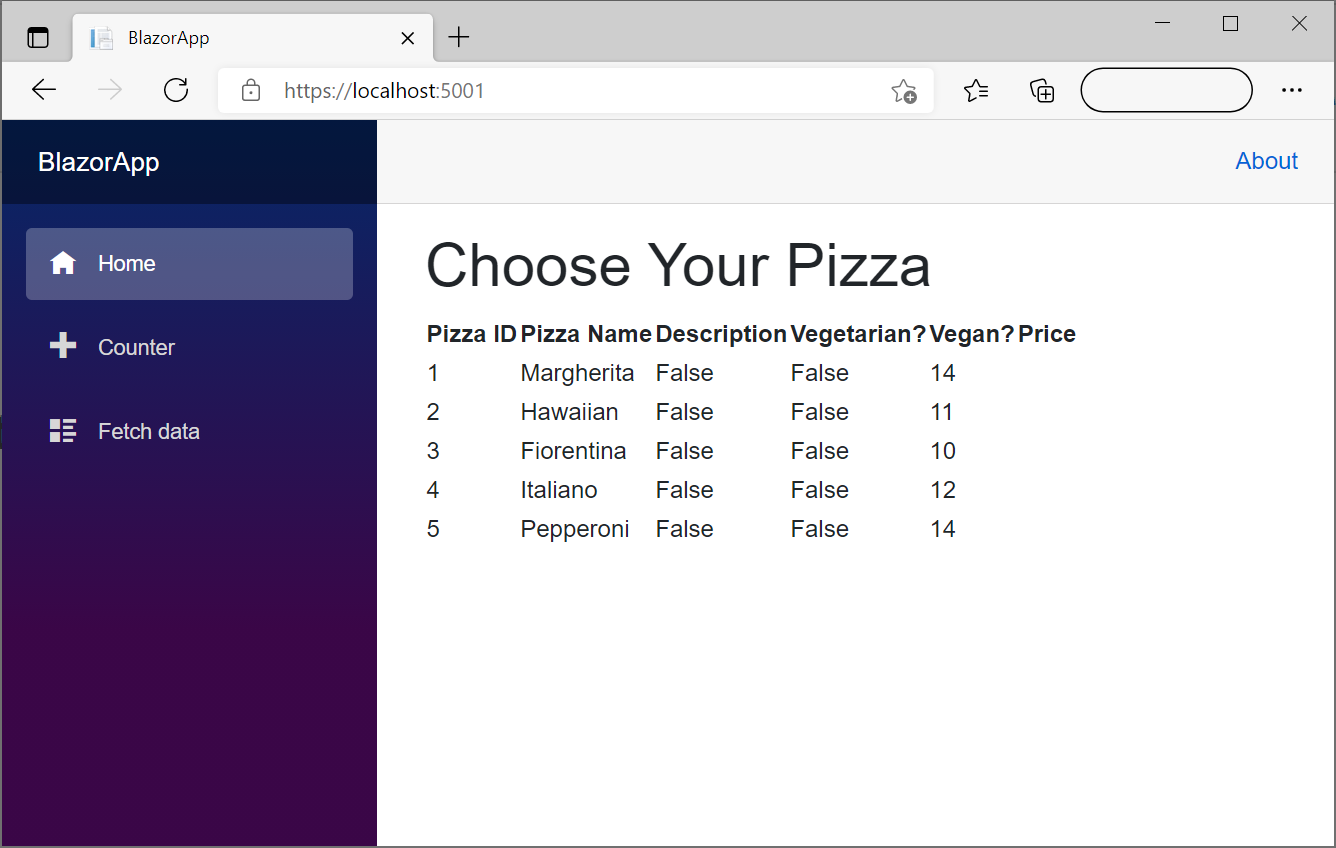
If Blazor executes the else statement in the preceding code, you know that some pizzas were obtained from the service. The next task is to display these pizzas to the user. Let’s look at how to display the data in a simple HTML table.
We don’t know how many pizzas are available when we code this page. We can use the @foreach directive to loop through all the objects in the todaysPizzas collection and render a row for each one:
You probably want a richer display of pizzas than the plain table shown in this example. You might want to format the price and other values. Work with your graphic designers to develop a more engaging UI. For example, include pictures of each pizza.
Note
Blazor includes other looping directives, such as @for, @while, and @do while. These directives return repeated blocks of markup. They work in a similar way to the equivalent C# for, while, and do...while loops.
In the next unit, you’ll register your own data service!
Blazor components let you define webpages or portions of HTML that include dynamic content by using .NET code. In Blazor, you can formulate dynamic content by using C#, instead of using JavaScript.
Suppose you’re working for a pizza delivery company to create a new modern website. You’re starting with a welcome page that is going to become the landing page for most site users. You want to display special deals and popular pizzas on that page.
In this unit, you learn how to create components in Blazor and write code that renders dynamic content on those components.
Understand Blazor components
Blazor is a framework that developers can use to create a rich interactive user interface (UI) by writing C# code. With Blazor, you can use the same language for all your code, both server-side and client-side. You can render it for display in many different browsers, including browsers on mobile devices.
Note
There are two hosting models for code in Blazor apps:
Blazor Server: In this model, the app is executed on the web server within an ASP.NET Core app. On the client side, UI updates, events, and JavaScript calls, are sent through a SignalR connection between the client and the server. In this module, we discuss and code for this model.
Blazor WebAssembly: In this model, the Blazor app, its dependencies, and the .NET runtime are downloaded and run on the browser.
In Blazor, you build the UI from self-contained portions of code called components. Each component can contain a mix of HTML and C# code. Components are written by using Razor syntax, in which code is marked with the @code directive. Other directives can be used to access variables, bind to values, and achieve other rendering tasks. When the app is compiled, the HTML and code are compiled into a component class. Components are written as files with a .razor extension.
Note
Razor syntax is used for embedding .NET code into webpages. You can use it in ASP.NET MVC (Model-View-Controller) applications, where files have a .cshtml extension. Razor syntax is used in Blazor to write components. These components have the .razor extension instead, and there’s no strict separation between controllers and views.
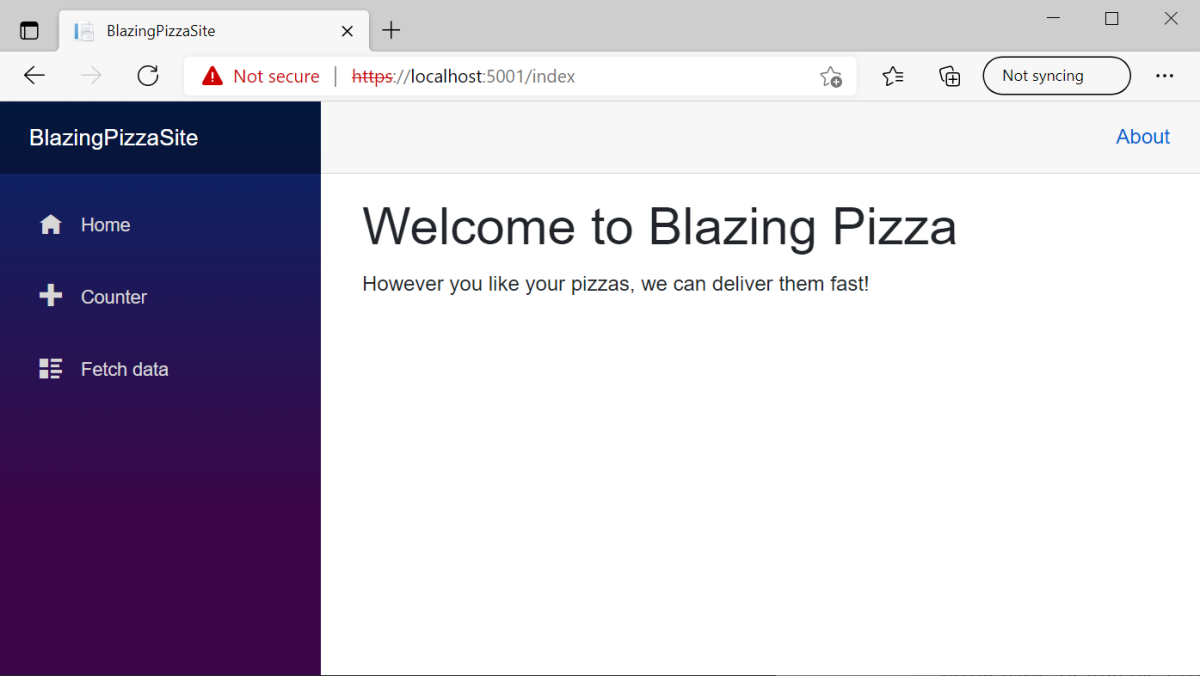
Here’s a simple example of a Blazor component:
razorCopy
@page "/index"

<h1>Welcome to Blazing Pizza</h1>

<p>@welcomeMessage</p>

@code {
  private string welcomeMessage = "However you like your pizzas, we can deliver them blazing fast!";
}
In this example, the code sets the value of a string variable, named welcomeMessage. That variable is rendered within <p> tags in the HTML. We examine more complex examples later in this unit.
Create Blazor components
When you create a Blazor app by using the blazor template in the dotnet command-line interface (CLI), several components are included by default:
BashCopy
dotnet new blazor -o BlazingPizzaSite
The default components include the Index.razor home page and the Counter.razor demo component. Both of these components are placed in the Pages folder. You can either modify these views to fit your needs, or delete them and replace them with new components.
To add a new component to an existing web app, use this command:
BashCopy
dotnet new razorcomponent -n PizzaBrowser -o Pages
The -n option specifies the name of the component to add. This example adds a new file named PizzaBrowser.razor.
The -o option specifies the folder that you want to contain the new component.
Important
The name of a Blazor component must begin with an uppercase character.
After you create the component, you can open it to be edited with Visual Studio Code:
BashCopy
code Pages/PizzaBrowser
Write code in a Blazor component
When you build a UI in Blazor, you mix static HTML and CSS markup with C# code, often in the same file. To differentiate these types of code, you use Razor syntax. Razor syntax includes directives, prefixed with the @ symbol, that delimit C# code, routing parameters, bound data, imported classes, and other features.
Let’s consider this example component again:
razorCopy
@page "/index"

<h1>Welcome to Blazing Pizza</h1>

<p>@welcomeMessage</p>

@code {
  private string welcomeMessage = "However you like your pizzas, we can deliver them fast!";
}
You can recognize the HTML markup with <h1> and <p> tags. This markup is the static framework of the page, into which your code inserts dynamic content. The Razor markup consists of:
The @page directive: This directive provides a route template to Blazor. At runtime, Blazor locates a page to render by matching this template to the URL that the user requested. In this case, it might match a URL of the form http://yourdomain.com/index.
The @code directive: This directive declares that the text in the following block is C# code. You can put as many code blocks as you need in a component. You can define component class members in these code blocks and set their values from calculation, data lookup operations, or other sources. In this case, the code defines a single component member called welcomeMessage and sets its string value.
Member access directives: If you want to include the value of a member in your rendering logic, use the @ symbol followed by a C# expression, such as the name of the member. In this case, the @welcomeMessage directive is used to render the value of the welcomeMessage member in the <p> tags.
Blazor creates interactive web applications by using .NET code. It allows you to share app logic on both the server and client side, without the complexity of managing client-side JavaScript libraries.
Suppose a pizza delivery firm hires you to modernize its customer-facing website. You’re given webpage mockups from graphic designers, and you discuss the site functionality in detail with all the stakeholders. Now, you want to begin building the site with the main pizza-browsing pages. Your team has many years of C# experience, but is less experienced with JavaScript, so you want to write as much code as possible in .NET. In later modules in this learning path, you build the checkout and authentication pages.
In this module, you learn about Blazor components, and how to use them to create a user interface that displays dynamic data.
Learning objectives
By the end of this module, you’re able to:
Assemble a user interface for a web app by creating Blazor components.
Access data to display in your web app.
Share data in your web app between multiple Blazor components.
Bind an HTML element to a variable in a Blazor component.